Wednesday, April 23, 2008

Charm Bracelet kit- giveaway

Wanna see what I gave away for the Earth Day challenge...... this awesome charm bracelet kit! I shamelessly copied the idea from Belinda CrazyArtGirl who has inspired me for a long time to really challenge myself, eventhough she didn't know it. She also sells her kits on etsy! I feel like my artistic direction is leaving paper farther and farther behind these days, and moving toward metal and assemblage. I've always loved natural materials: leather, linen, bronze...combine that with rock and roll and age it a bit. I think that's where I'm headed...hang on, it's gonna be a bumpy ride!

By the by, my friend Neith, who is incredibly talented in her own right was the clever one who won the prize. Congratulations Neith! If you're looking for awesome paper...she's the one to visit. Please tell her I sent you!

Comments and constructive criticism always welcomed!!

Tuesday, April 22, 2008

BCGLM Pendant


Birch bark
Copper
Leather
Glass Bead
Mica
Pendant.

I really enjoyed a copper weaving class taught my Mary Hetts a few weeks ago, and dug out the leftovers from class. WOW, great leftovers, right! I thought it fitting to celebrate Earth Day by playing with materials I already owned, and keeping them all natural! Everything in this pendant comes from nature! Minerals, trees, leather, glass. Sure there's a bit of manipulation by us, but noting artificial added! I have to go find some suppliers for this stuff, loving loving loving this technique!

Monday, April 21, 2008

Earth Day Bracelet


What a better way to celebrate Earth Day than recycling odds and ends meant for the garbage into a wearable piece of art! I'll tell you how I did it a little later on...can't ruin the HAPPY MOTHER'S DAY TO ME! gift I got over the weekend. I can tell you I used some scrabble tiles, felted wool, funky glass beads, some Czech glass, UTEE paper beads, bingo chips...just about anything I could find within reach. I guarantee I'll be making many many more of these now that I have my ....new toy.....ooooooooohhhhhhhh I'm so excited!!!!

Remember, if you entered the Earth day Challenge over at CS, you'll win enough charms to make your own bracelet!!!! Go enter, go play, be good to others and have a great day!

Friday, April 18, 2008

A friend having a rough day...

This song is for you!!

"Pretend the water is champagne, and fill my glass up again and again..."

I'd send you a flute, but I lost it at band camp! So, go dance and smile.

Transparency is a good thing.

Wednesday, April 16, 2008

Out of the box with Vanessa

I was given this card and supplies from Vanessa with the theme Birds and Butterflies. I made a little mini book I learned over the weekend. It says:
Better days
Bristling with reeds and thistles
Spread flowers downhill
in leisurely circles
towards the distant gleam of the sea.


Made with UTEE paper beads and dragonflies.

Tuesday, April 15, 2008

Make it University with Cloth Paper Scissors -Chicago

The International Quilt festival was held this past weekend in Chicago, about 15 minutes from my house. I am NOT quilter, mind you, but WOW WOW WOW! The quilts shown did not come from your grandma's quilting bee! Really neat stuff!
Quilting Arts Magazine and Cloth Paper Scissors are run out of the same publishing house, so they had an awesome booth there, and what they called "Make-it University". They invited many of their frequently published artists and a few local artists to come teach mini (1 hour) classes, and participate in their 'virtual studio'. The 'virtual studio' had the artists demo-ing various things all weekend! Time to drool, and stare, and learn so many techniques....a ha, so THAT'S how you did that!
Friday, I couldn't get there before noon, so I missed a few classes, but when I did show up, I put my name in the fishbowl for all the remaining ones. Each class is decided by a random draw, so maybe you get in, maybe you don’t...I think it's all Karma, or the pathetic pleading look on my face each time Barbara went to draw names, that I did get into all but one class.
The first class I was not in was a mini, no-sew, book out of muslin! so so so super cool, and easy peasy to make! I brought along my studio-in-a-box, sat on the floor, and followed along with my own materials. Just then, I ran into someone...I'm so sorry I forgot your name, but you were soooooooooooo nice!!!!!!...who is a club scrap member! She noticed I was monkeying with paper, and picked "To you with Love" right out, saying "I see you use Club Scrap papers."...see, we're everywhere, like a secret society, bonded with Bookbinding glue and waxed linen.


Class #2-Greeting Cards with Angelina fiber, Betty Blais instructor. I deviated from the path, because the saying I was given was "I'm sending a little sunshine your way..." too bright and cheery fro me, so I started my little Asian boy tag. He needs a bit more, and some words, but a good start. *there is a local artist I've been a long time admirer of, Belinda Spiwak sat next to me in this class...Hi Belinda! I'd like to think we've become friends, and pal'ed around a bit during the show. She made the Mahjong tile and dyed the fabric all the stuff is laying out on with colorwash.


Class #3-No-Sew Mica Tag Book, instructor 
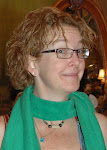
Kelli Perkins!!!! Really, in the flesh, Kelli Perkins! Librarian by day, amazing artist by night. White as snow hair, with a gigantic blue streak in it! She make the cupcake book in this month's issue of CPS.


Saturday-
Class #1-Woven copper Jewelry-Mary Hettmansperger (author)...If she comes anywhere near you TAKE HER CLASSES!!!! So funny, so talented. It was early in the am, but so worth it! Learned a ton about working with copper sheeting and wire. Belinda & Gwen, I'll get the directions out to you this week.
Ran into Miss Gwen Jaeger during this class, unfortunately she arrived after class had started. Class #2- didn't take it, buy Gwen did. Another working with Angelina class.


Class #3-Storyboxes (Altered tins)- Leilani Pierson, instructor. Gwen, Belinda and I got into this one. The kit was so full of goodies, we both went nuts! Leilani was great and super laid back, and very pregnant with her 4th!!! The outcomes were fabulous tins with mini books.


Class #4-Needle-Felted pincushion, Tracy Stillwell (Artgirlz), instructor. Needle felting is a secret hobby of mine. I love love love it! And the Artgirlz are possibly 2 of the coolest, REAL, people I’ve ever met. We were to make a pincushion slap bracelet, but again I deviated and made a hand grenade keychain…ode to Green day…

Class#5-Surviving the runway, 80’s style with Pokey Bolton, owner, editor, everything Cloth Paper Scissors. Can I tell you, speed crafting is the BEST!!!!! I can’t tell all the secrets of this one, because they’re going to do it again in Houston, but let’s say it was so much fun. You’re given basic materials, and a goal, no samples on this one. To earn embellishments of any kind, you must do things….very very silly things….even for time! I proudly took home 2nd place with my ‘Clash mask’, earrings and necklace. So silly, an amazing way to relax and if I ever host a party or stay-at-home retreat, I guarantee this will be on the agenda…after a few cocktails, I can’t imagine where it would go!!!! Photo from Pokey's blog.

Sunday- I schlepped myself to class in sweats and a t-shirt.
Class #1- Mixed-Media Brooch, Betsy Shannon, Instructor. Poor Betsy, she didn’t know she had a Sunday class too, and had run out of materials so she was panicked, and her coffee hadn’t kicked in yet. She did come up with some great stuff for us, and another booth donated pins, That’s where my heart with wings pin came from.


Class #2-Mixed Media Fabric, Judy Perez Instructor. Oh my, holy Christmas!!! This woman is not only beautiful, kind, incredibly creative but patient, and just one of the most amazing people I’ve ever met. She is on the Cover of CPS this month with her birdhouses. Once I knew she was there, I asked her a few questions about techniques and she said she was teaching the class on Sunday, so I was absolutely crossing my fingers for this one. I got in! It was an amazing way to finish up the weekend! PS- She posted a foto of us after 'Surviving the runway!"

One of my favorite moments was recognizing Bernie Berlin, and watching her work. She is tuely a great individual. If you don’t have Bernie’s book on ATCs and Techniques, you are missing out on a lot of stuff. She kindly signed my book, and helped me work an ATC I was stuck on. Finally, after almost 1 year I was able to hand her the baby scale I had been promising for her shelter. Hopefully she'll no longer call me "The Crazy scale lady!!!"


The International Quilt show will take place again in Houston, and I think California later this year. If you’re in the area, and put your name in the fishbowls, you might get some of the same, maybe other awesome classes. The greatest part is that class fees were only $10 each!!! What a steal!

Well, that’s my weekend, if you have any questions, let me know. I guarantee you’ll start seeing a lot of these techniques on my ATCs and Cards in the near future!!

Thursday, April 10, 2008

Think outside the box...

...is a swap I've been hosting over the past few weeks. Each player makes something, then sends enough materials of the same to someone else, who in turn makes 2 things, and sends one back to player #1. Confused? Yeah, there's really no way to explain it without going into a gazillion details, but here are my entries for 'Vintage'. My partner Rachelle sent me this amazing pocket tag:


In turn I send her back this card:

Wednesday, April 9, 2008

the portable studio


I picked up a copy of Sommerset Life, and fell in love with the Vintage Train case Rebecca Sower transformed into her traveling studio. Immediately, I knew I wanted, NEEDED to do the same.
I've been looking for an old wooden briefcase for a few months with no avail, then my Mom offered me one of hers. Woo hoo! Perfect. It's covered in a worn vanilla lizard skin type material of some sort with a yummy felty inside.

I've spent the day collecting my favorite things...stuff I never use, but love to look at...and filled up my case! Vintage fabric swatches, some amazing lace which belonged to the 92 year old grandma of a friend, natural twine, silk flower petals, handmade paper and a bunch of buttons from my own grandma's sewing box. I even included a needle my maternal grandmother used to use and my paternal grandma's sewing scissors!
It's going to be so hard to actually use these treasures, but I know that whatever I create will be filled with kindness, love and legacy.
Now that Spring is apon us, I know my briefcase will spend many hours outside!

Tuesday, April 8, 2008

and the winner is.....

"You are so clever! I enjoy everything you do. Keep it up. Pat F." Congratulations Pat! Please email me your address, so I can send you your tag!(luanneiwan@hotmail.com)

To everyone...Thanks for stopping by, and the comments & compliments. Allison picked a random number and Miss Pat is our winner!

I had a lot of fun doing this, so do look for more in the very near future! -luanne

Sunday, April 6, 2008

My first tutorial!

I love to find inspiration in the work of others, and I have to say I am a HUGE fan of Tim Holtz, as an artist, and as a person. Now, I've never met the man, but I stalk his blog a few times a day hoping for some insight into his latest, greatest stuff, and to see if he has a new tutorial up. Today, I watched his Cosmo Cricket tag tutorial, and wanted to give it a try. Also, over at Club Scrap they are having a stencil challenge this week, so I thought I would combine the two, and give you a glimpse into just how I make stuff. Ready??


I grabbed a big tag and used it as a template to make a tag out of patterned paper and regular cardboard. *notice how clean my workspace starts out, that'll change quickly!


Tear the patterned paper on an angle, not too much, but enough for the cardboard to show through.


Tear the top layer of the corrogated cardboard open, exposing the wavy bumpy stuff underneath. I like to use my scissors (closed) to start the distruction.


Hold the patterned paper against the cardboard to see if you've destroyed enough of the top layer. Once you're happy, it's time to get our fingers messy!


Place your stencil over the paper and apply clear embossing ink, covering the stencil too. Don't try to get it in the little spaces, you can wipe it down when you're done pouncing.
I have yet to find an embossing ink I like, so I use the Palatte glue pad, not that I'm thrilled with that either, but it has worked the best for me. I pounce it over the stencil, and don't bother heating it, since it's wet already.


Cover the wet areas with CLEAR embossing powder. I use this so often, I was sick of sticking it back in the jar, so I dumped it into a plastic container with a lid (and secure with a rubber band) Works soooooooo much easier!
Gently tap off the excess.


Using your heat gun, moving it slowly, but constantly, heat the powder until it melts and begins to shine. Not too much or you'll burn it up. You want it to remain raised.
If you're new to heat embossing, notice how it changes from white to clear...oooooohhhhhh.
Give it a minute to cool before you touch it or you'll burn yourelf.


Done embossing for now, and it's all pretty and clear.


You've done all that work, and now you're gonna paint over ALL OF IT!
Find a paint you like and cover the whole thing.
*Please trust me on this


Now, some people wait until it's totally dry, but I get so nervous I can't wait. Use a towel to rub the paint off the surface of the tag. The embossed areas act as a RESIST, and literally resist the paint. the paper is dry and soaks it up 1-2-3, so the color stays on the paper, but not where you used your stencil...oooohh#2! I used a damp cloth, because I wanted some of the paper to show where it wasn't embossed.


Paint: With a dry brush
In one direction
Not overlapping
with black.


Buff again, to get the effect you want.


Take your handy-dandy distressing tool and roughen up the edges. I run it a few times over the blades, but keep an eye on it. You can go from distress to destroyed in no time. Oh, please make sure the tag is dry when you do this, or big big problems and tares and bad stuff ...


Hurray!!! Finally time for some ink. Since I used black paint, I grab some Black Soot distress ink, and apply it to the distressed edges of my tag. I try to make the edges the darkest part of the tag, to indicate shadow. Since I used black as a shadow on the tag, I need to stick with black for the edges.


Ok, go put that aside for awhile, it's time to give some attention to the cardboard. Cardboard is an awesome, practically free medium to work with, and so often we overlook it. 3 cheers for the cardboard!!!! Hip hip hurray, Hip hip.... ok ok. On my craft sheet I drop some brown paint next to the black. Dab your brush into both, but don't mix them. You want the randomness. Paint your cardboard tag where you tore it.


Paint the edges as well, and when that dries, paint the back. I often spritz the paint when it starts to get low with water, to stretch it for the back of the tag. Gives it more of a wash than a paint. Whatever you like, it's your tag.


When the paint is dry, lightly sand the tops of the ridges with a fine grit sandpaper.


Adhere both tags together.

I know you don't need to see me apply adhesive to the tag, but I love the little skully's with their rhinestone eyes, I had to show off my ATG gun, and the camera was right there. Staz-on will keep them there indefinately.


Grab the manilla tag you used as a template way back in step 1, and use it again as a guide where to punch your hole. *The pink thing is a crop-a-dial *Look at the desk now, messy messy.


I painted a bit of the torn cardboard that came off when I was destroying it, and placed it over the hole. I like to use the end of a paintbrush to widen the hole, and roughen it, so it doesn't look lik a clean punch.


I set my tag next to the background paper it's going to go on for my layout. Turns out, it's way too bright, so I have to tone it down a bit with some pale yellow.


I want to add an image to the front, as a focal point, and decided on a stamped, heat embossed image which matches the 12x12 background paper. I stamp with clear, because it's right there, &this time I sprinkle gold embossing powder, shake off the excess, and put it back in the jar. Grab the heat gun and melt away until it's very bright and raised. I gotta say, I love the way gold embossing powder smells when it melts..mmmm


Just like before with the blue, cover the entire image with black paint.


Buff as before, and the gold will come out of hiding. I love this part because I convince myself every time I've messed it up, then I realize it's fine, and so cool.


I set the tag against my 12x12 and decide the colors are great, but we need a little bit more.


I add wooden beads with glossy accents, and paper rolls tied with beading thread. A few strands of ribbon and fiber from the stash, and Voilla! Now if you've stuck with me this long...leave me a comment, and in honor of Tim, I'll pick a name at random and send you the tag!